
Create a project and prepare your first job
A project keeps one job together: its building, floors, estimates, schedule and documents. You do not have to start with a model. For a renovation or a simple estimate, start without a drawing and add the plan later.
Who can use this guide
Creating a project needs Creating projects and project settings: Changes. The same permission lets you change its name and address. Adding floors needs Building drawing and model: Changes separately. The account and project must allow saving.
The Worker, Subcontractor and Guest templates do not include permission to create projects. If the button is missing, ask the person managing the team to create the project or grant the right access. Check the selected company first.
Prepare a project name, building type and currency. You can add the address after creating the project. The name must be unique within the current company.
Create an empty project
- Open Projects → New project.
- Choose Construction with a drawing or Renovation or pricing without a drawing. The second option lets you price work without creating a floor first.
- For a building, choose Start empty when that option is available.
- Enter a name, choose the building type and check the currency. Add a description or customer if needed and if that field is available to you.
- If you know the rectangular outline dimensions, choose to enter them now. Otherwise, set the outline before adding the first floor.
- Select the project parts you will prepare and confirm creation. The renovation form is shorter.
After saving, the project Overview opens. Check the name and job details. Shortcuts and financial amounts depend on your permissions. A missing price does not mean that project creation failed.
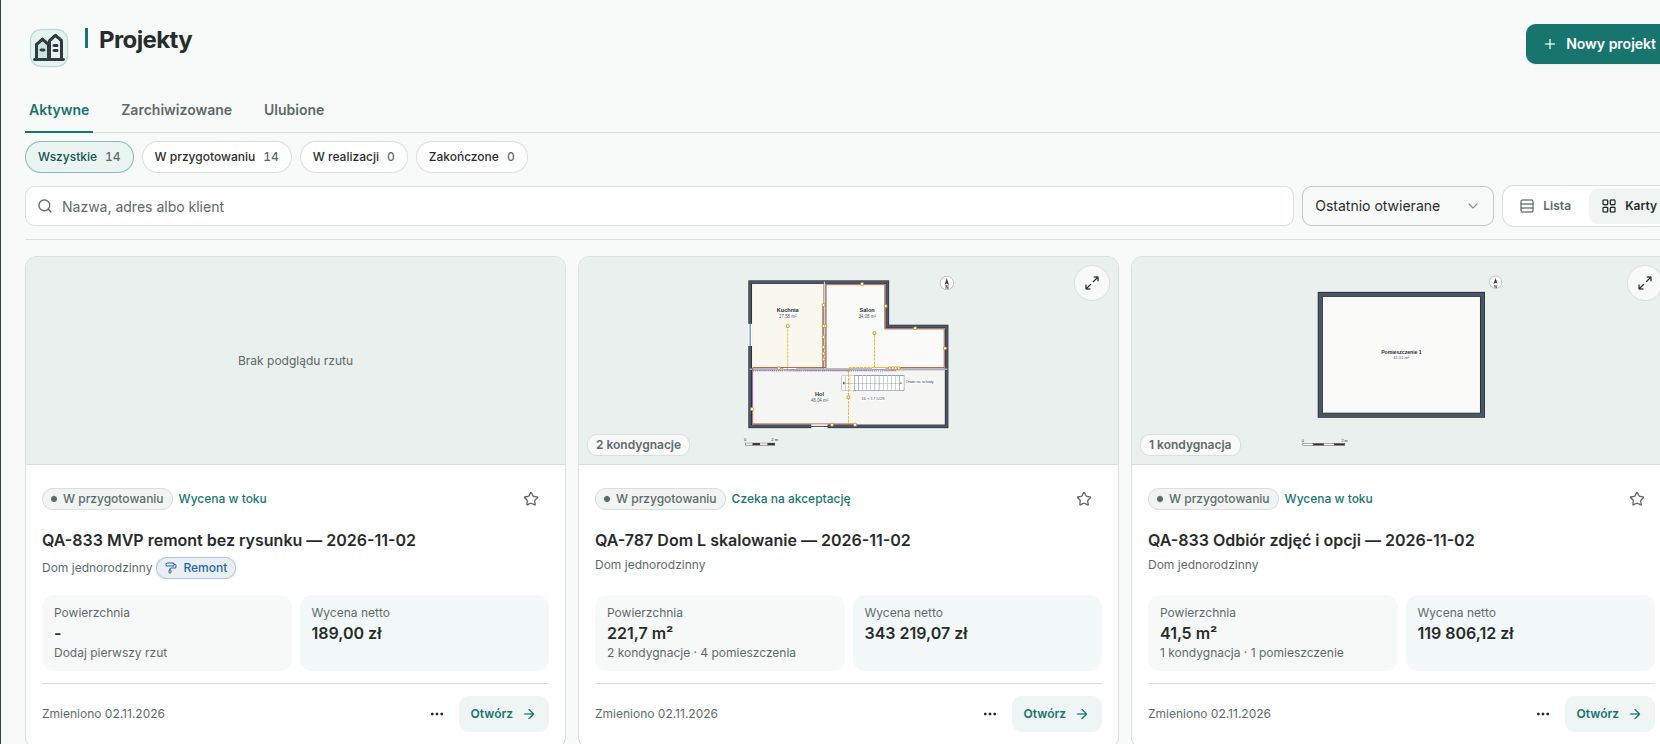
Projects list — example data
The screenshot shows the Polish interface.
Set the location and floor
Open Location in the project header. On a phone, check More. Enter the address or mark the location on the map and save it. A location is needed for a Geoportal map.
Next, open Floors and plans. Prepare the building outline and add a floor, checking its height. Open the drawing from that floor card. Before drawing, check that you selected the right floor and building.
You can also use the house wizard
Price a house guides you through the shape, floors, construction method, roof, foundation, name and address. Check the model it creates. An estimate is created when the Estimates module is available. Without estimate means that only the model was created.
The wizard provides a starting point. It does not confirm that a building design is complete. Before using the estimate, check its scope, quantities and price-list prices.
If the result is unexpected
- Name already used: enter another name within that company.
- Project missing from the list: clear the search and check Archived and Favourites.
- Only some projects are visible: access to selected jobs shows only assigned or shared projects.
- Project is read-only: someone with project settings permission can use Enable editing. Check account access separately.
Do not delete a project to fix a missing button. Archive completed work when appropriate. Permanent deletion has different consequences and is not a troubleshooting step.
Exercise: create your first job
Create a project called “Practice — ground-floor renovation”, or choose another unused name. Add a description and location. If you are practising drawing, add one floor. Otherwise, continue to an estimate without a plan.
Check that the project belongs to the correct account, uses the right currency and opens again from the list. Check the added floor name as well. Continue adding data only when these checks pass.
Continue learning
Next, draw a floor plan, prepare an estimate or add project documents.