
Draw a floor plan and check the model
Use the 2D plan to prepare the building shape, walls, openings and rooms. These details provide the 3D view and quantities for your estimate. Start with one floor and correct dimensions. The accuracy of the drawing affects the quantities.
Before you start
You need a project with a floor and Building drawing and model: Changes. Being able to view a plan does not mean you can change it. Removing walls, openings or floors needs Building drawing and model: Delete separately. The project and account must allow saving.
Prepare dimensions from your documents or site measurements. If you are tracing a scan, first add and align an underlay. An image alone creates no walls. You need at least one reliable dimension to set its scale.
Set up the plan and divide the rooms
- Open the project → Drawing, or choose Open in 2D plan on a floor card. Check the building and floor in the header.
- Select 2D. In the Building stage, set the shape and check the external dimensions and floor height.
- Open Visibility from the side bar or through View. Show the dimensions and element names you need. The grid and snapping can help you place points.
- Switch to Walls & rooms. Choose Wall on the toolbar or under + Add, and draw partitions inside the outline. Rooms are formed from the wall divisions.
- Choose Wall opening, select Door or Window and click the relevant wall. Select the opening afterwards to correct its dimensions.
- Return to Select / edit, choose an element and check its settings. Enter exact numbers instead of judging distances only by eye.
- Wait for automatic saving to finish. Inspect the rooms and openings in 3D as well.
The result is a saved plan with room divisions and openings. Switching to 3D helps you check heights and how elements fit together, but does not replace checking dimensions.
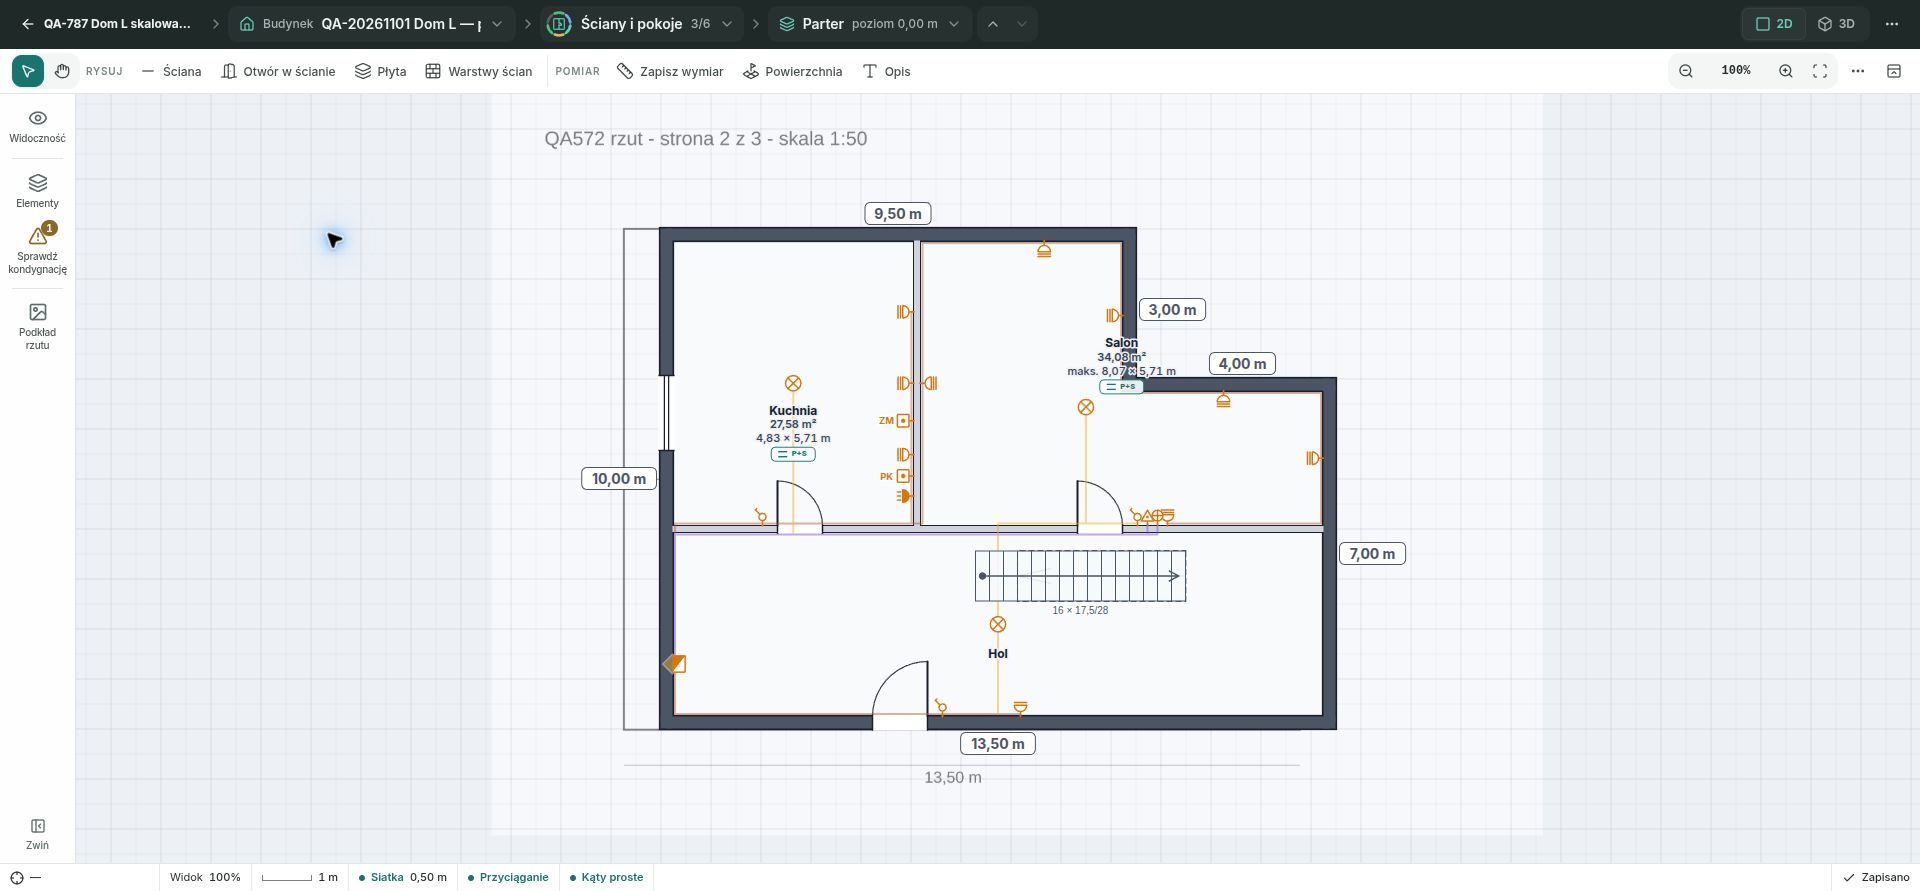
2D floor plan — example L-shaped house
The screenshot shows the Polish interface.
Check the plan before estimating
Open the project check panel on the left. On a phone, choose Check on the bottom bar. Correct errors first, then review warnings and information. Selecting a reported issue points to its elements on the plan.
Look for overlapping walls, gaps in room boundaries, missing entrances, and rooms without floors or ceilings. Read the consequences before accepting a suggested fix. Apply it only if it matches the real building. Then choose Check again.
Working comfortably and solving problems
On a phone, choose Move view and use two fingers to move or zoom. Zoom in before changing small elements. Return to Select / edit so the next tap does not add another element.
- Missing tool: check the drawing stage and selected project parts. Roof tools are in a different stage from walls.
- Tool keeps adding elements: press Esc or switch to selection. Esc first cancels drawing already in progress.
- Cannot remove an element: check the separate deletion permission. A suggested fix that removes elements also needs it.
- Model changed elsewhere: inspect the refreshed plan and the message before repeating your change. Avoid editing the same area in several tabs.
- Saving does not finish: read saving problems.
Exercise: two rooms
Prepare a rectangular floor in a practice project. Divide the inside with one wall, add a door between the rooms and add an external entrance. Run the plan check and inspect the result in 3D.
Check that two rooms are visible, the doors belong to the right walls and the heights match your intentions. Resolve or explain each reported issue within this scope. Wait for saving to finish before ending the exercise.
Continue learning
Review measurements and quantities, then prepare a project estimate.