Guide · Quantities and quotes
Model quantities and floor plan measurements: what to check
Start by asking what you are pricing. Floor area, one side of a wall and an external facade cover different work. Kaldrix provides model quantities and separate measurements saved on the floor plan.
1. Match the quantity to the work
Open quantities and schedules in the project. Room area is measured inside wall faces. Net wall area covers one side after deducting openings. Net facade area uses the outer sides of walls marked as external.
Check whether the price covers one or both sides of a wall. Compare several results with the drawing and scope description. The wrong scope can duplicate a quantity even when the geometry is correct.
2. Save a measurement for work outside the model
Measure a trim length or a paved area on the floor plan. Choose a saved length or area measurement, mark its points and give it a clear name. Add a note explaining what it covers.
Saved measurements are separate takeoffs. They do not increase model totals in the project quantity overview. A quick measurement only checks a distance; it does not save a result for later pricing.
3. Review quantities before estimating
Match the service unit to the quantity: metres, square metres, cubic metres or items. Include only the elements covered by the job. Avoid pricing the same area both from the model and from a saved measurement.
After changing dimensions, openings or layers, return to the estimate and check whether it needs updating. A work quantity is not yet an order quantity. Check consumption, waste allowance and full packs separately for materials.
Check before the next step
- Name the scope and check the unit.
- Compare quantities with the current drawing.
- Remove overlapping scopes before pricing.
Step-by-step exercise
Check model quantities and save your own measurement
What you will do
Distinguish room area, wall area and a saved measurement. Prepare a named takeoff for an estimate without counting the same scope twice.
Practice example
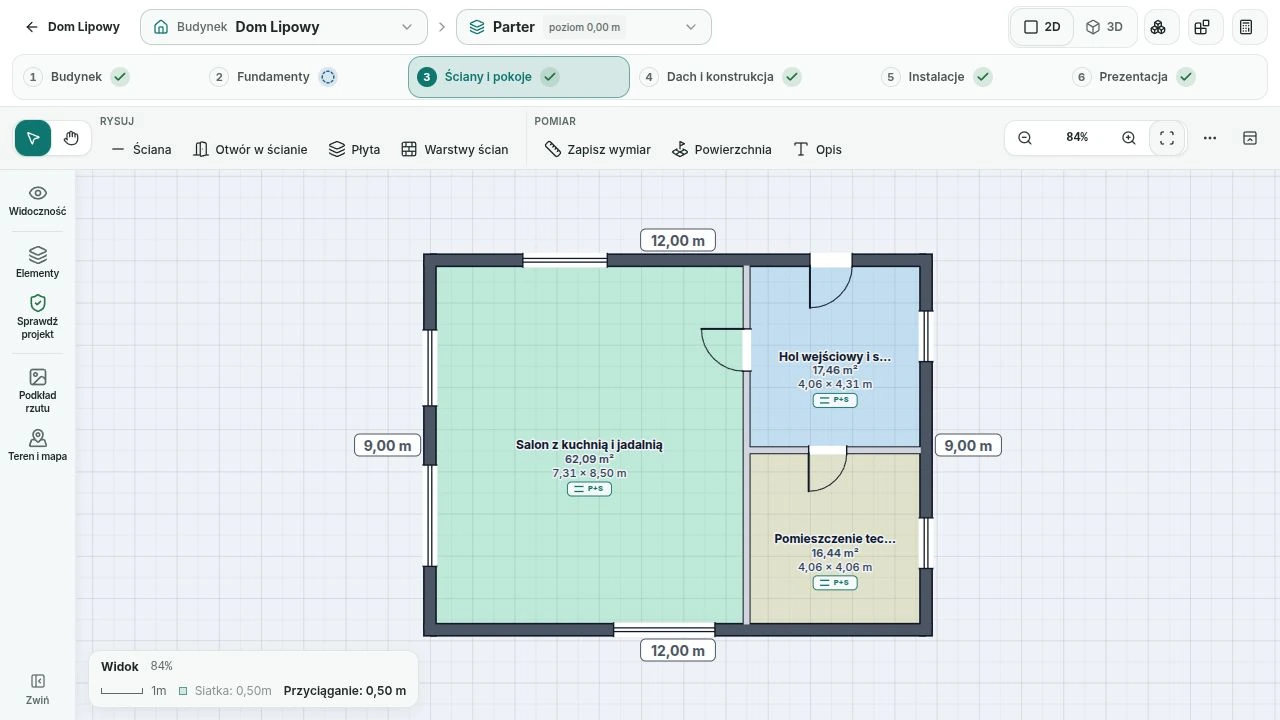
Choose one enclosed room in the practice project, then save a measurement of part of its floor. A rectangle measuring 4.00 × 3.00 m inside wall faces has an area of 12.00 m². This is a calculation check, not the expected area of every room.
Prepare before you start
- A checked plan with a named room and known underlay scale.
- Project viewing access and drawing editing permission if you save measurements.
- A work description identifying a floor, one wall side, facade or separate area.
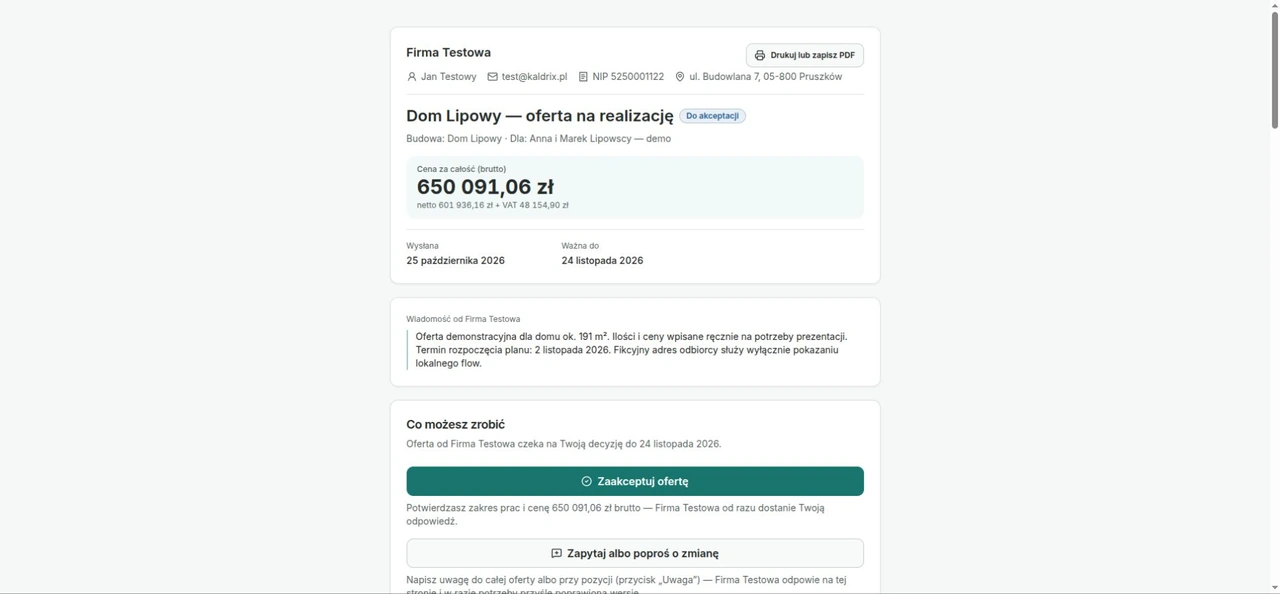
In the print window, choose Save as PDF if your browser provides that option. Check the page preview before saving.
Follow these steps
Write down the scope of the exercise
- Choose one scope, such as the floor in a room, and note its name and m² unit.
- State what is excluded: other rooms, walls and the whole floor slab.
Expected result: You can explain in one sentence which work the quantity represents.
If you get stuck
If the scope says “all surfaces”, narrow it to one kind of work. The same number in m² could describe a floor or a wall.
Read the right model quantity
- Open the project quantity overview. Check the floor and room area.
- Compare it with the drawing. For a rectangle, use dimensions inside wall faces rather than the outside building outline.
Expected result: You know where the room area comes from and how to check it. The result matches the drawn interior shape and dimensions.
If you get stuck
If the area differs, check scale, wall connections and the selected floor. For an irregular room, divide your manual calculation into simpler parts.
Compare wall area with room area
- Read the net wall quantity and compare it with floor area. Check that it covers one wall side after deducting openings.
- For a facade, check that the wall is marked as external. Do not substitute total floor area for wall area.
Expected result: You can distinguish quantity sources and will not confuse painting scope with flooring merely because both use m².
If you get stuck
If you are unsure whether the job covers both partition sides, return to the scope description. Do not double a quantity without confirming the work.
Draw and name an area measurement
- Return to the drawing on the same floor. Choose + Add → Measurement → Area.
- Mark the practice area corners and finish with a double-click. Enter a name such as “Flooring — practice area”, add a description and save the measurement.
Expected result: The plan contains a named measurement with a description. You can select it again and recognise its scope.
If you get stuck
If the area is wrong, cancel and start again. Quick measurement alone does not save a takeoff for later pricing.
Check your measurement with a simple calculation
- Check the measured rectangle sides and multiply them. If they are actually 4.00 and 3.00 m, the area should be 12.00 m².
- Compare the calculation with the measurement and zoom in on the corners if they differ.
Expected result: The checked measurement matches the selected points. You can explain why it differs from the full room area.
If you get stuck
A partial room measurement need not equal the full room area. For a large difference, recheck scale and corner positions.
Confirm that the measurement is a separate source
- Return to the model quantity overview and compare its total before and after saving the measurement.
- Note whether you will use model quantities or the saved takeoff for the same work in your estimate.
Expected result: The saved measurement does not increase model totals. You have selected one source for the same work.
If you get stuck
If the model total changed, check whether you also edited walls or someone else changed the plan. Do not attribute the change to the measurement itself.
Prepare the quantity for the right service
- Note the scope name, value and unit. Use m² for an area service and a length unit for length work.
- Before the next exercise, check whether this scope has already been priced. Material packs will come from a service breakdown, not from simply renaming a unit.
Expected result: You have a clear scope and suitable quantity source ready for an estimate.
If you get stuck
For a volume, prepare the layer thickness as well. Area alone does not tell you how many cubic metres or bags to buy.
Check your work
- You can explain room area versus net wall area.
- You can find the named measurement after reopening the plan.
- You choose one source and a matching unit for one scope.
Common obstacles
The building area total did not rise after saving a measurement.
That is expected: measurements are separate takeoffs. Find saved takeoffs when preparing the estimate rather than expecting model totals to change.
The takeoff is almost twice as large as expected.
Check whether the same floor was selected as both a room and a complete slab, or added again from a measurement. Remove the duplicated scope rather than applying an arbitrary reduction factor.
I changed openings, but the quotation still has the previous quantity.
Return to the estimate and check quantity updates. A previously saved item needs a deliberate review after a model change.
Next exercise: From quantity takeoff to quotation: connect quantities and prices →