Guide · Documents and teamwork
Project documents: find the right file and check access
A drawing, photo or quotation should be easy to find when needed. Start with the right project and storage area. Then check names, categories and access for the people who need the files.
1. Choose the right place for each document
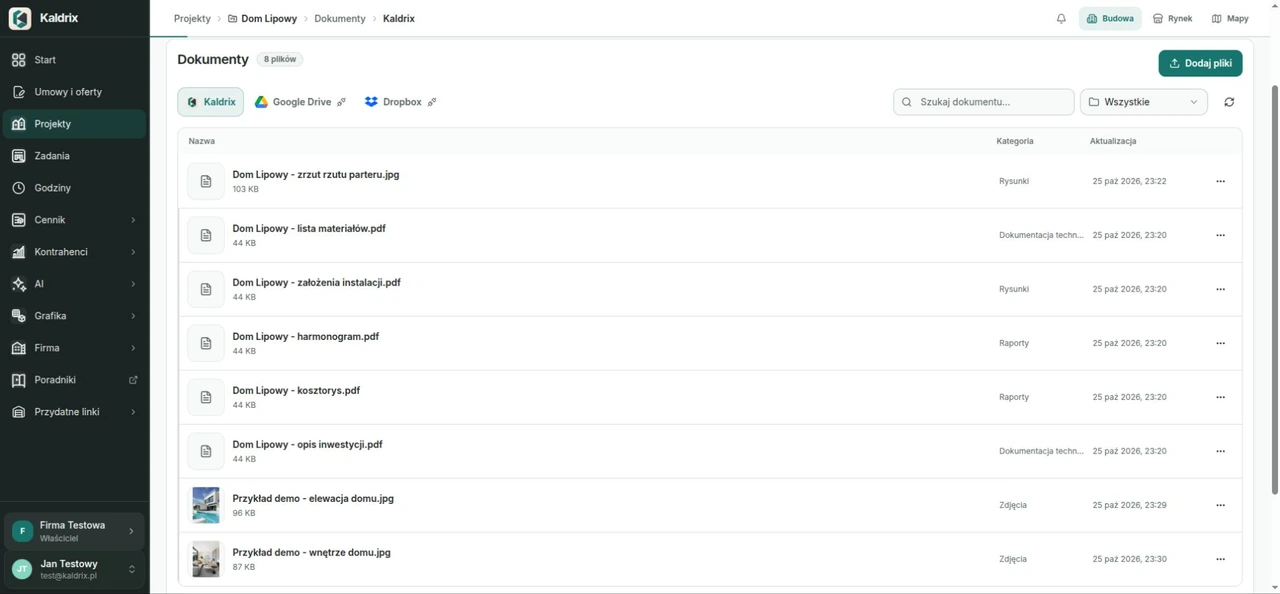
Add build-specific files to the project. Company documents support shared team matters. Personal storage holds your own files; they do not automatically appear in project documents.
Check the project name before adding a file. For similar renovations, include a date, floor and scope in the file name, such as “2026-11-02_ground-floor_services.pdf”. Keep the file extension.
2. Use a category and a useful description
Choose a category such as Drawings, Photos or Agreements. Add the drawing number, work stage or relevant decision to its description. Names and categories help narrow later searches.
Open the preview and check the contents. View photos and PDFs in the app. Download files that need another program. When you add a new version, make it clear which one is current.
3. Check access before passing work on
Project access does not grant access to every document. Internal files and documents with prices have further restrictions. Check the permissions of the person receiving the work.
Project and company documents can use Kaldrix, Google Drive or Dropbox, depending on settings. Connect a cloud drive and share its folder in that service too. Kaldrix does not automatically grant permissions there.
Check before the next step
- Check the project, file name and current version.
- Add a category and a clear description.
- Confirm file access and cloud folder permissions.
Step-by-step exercise
Exercise: organise and find a project drawing
What you will do
Add a file to the right site, describe it and check that you can find it later.
Practice example
Make your own simple PDF or image saying “Training drawing — version A”. Include no names, site addresses or customer documents. Save it in “Pavilion — training”.
Prepare before you start
- A training project, Documents and files: Changes permission and the ability to save.
- Your own sample PDF, PNG or JPG within the limit shown when adding files.
- An internet connection and available file space. Use the Kaldrix drive in this exercise, without connecting external services.
In the print window, choose Save as PDF if your browser provides that option. Check the page preview before saving.
Follow these steps
Open the right project’s documents
- Open “Pavilion — training” and its Documents tab.
- Check the project name and choose the Kaldrix drive. Do not put this drawing in Personal drive or Company documents.
Expected result: The list shows the selected project’s documents on the Kaldrix drive.
If you get stuck
A file on another drive or project will not appear here. Check the location before adding the same copy again.
Add the sample drawing
- Select Drawings in the category filter. Choose Add files and select your sample PDF or image.
- Name it “Training-drawing-A”, keeping its extension. Choose Send files and wait for Done.
Expected result: The file is in the project documents and has finished sending.
If you get stuck
Read the size limit and supported file types in the window. If sending stops, check the list and file status before trying again.
Check its category and add the version
- Open the file and Edit details. Check the visible name and Drawings category.
- In Document notes, choose Add field. Add a text field named “Version” with the value “A — training” and save the details.
Expected result: The name, category and note identify the file without opening its contents.
If you get stuck
A file added with the All filter may have No category. Set the category in its details instead of adding the file again.
Find it by name and category
- Return to the list and search for “Training-drawing”.
- Check the result under Drawings, then clear the search text and compare the full list.
Expected result: You can find the same document and understand how filters limit the list.
If you get stuck
No result does not mean the file was deleted. Check the name, category, project and selected drive.
Check the preview contents
- Open the file you found. In a PDF, inspect the right page; for an image, check that it is readable.
- Compare “version A” in the file with the document note.
Expected result: The preview shows the right drawing and matches its description.
If you get stuck
DOCX, XLSX or ZIP files may need downloading and opening in your own program. This exercise uses a PDF or image, which have previews.
Download a copy and check the original again
- Choose Download and check the downloaded file on your device.
- Reopen this project’s Documents. Check that the original remains in the list with its saved note.
Expected result: You have a working device copy and the original in the project.
If you get stuck
Downloading does not remove the original. Do not use Delete to clean up your device copy — deleting the Kaldrix document is permanent.
Check your work
- The sample file is on the Kaldrix drive in the right project’s documents.
- You can search for it, check its category and identify its version.
- The preview and downloaded copy are readable; the original remains after reopening.
Common obstacles
I cannot see the file after adding it.
Check the sending status, drive, project and filters. Do not send another copy until you check the previous attempt.
A colleague sees the project but not the document.
Check document access and whether the file is internal or contains amounts. Site access alone does not allow every document.
An old download link no longer works.
Return to the file list and choose Download again. A saved download address is not a permanent sharing link.
Next exercise: Project collaboration: give each person the access they need →